Matte Gel Nails Tutorial

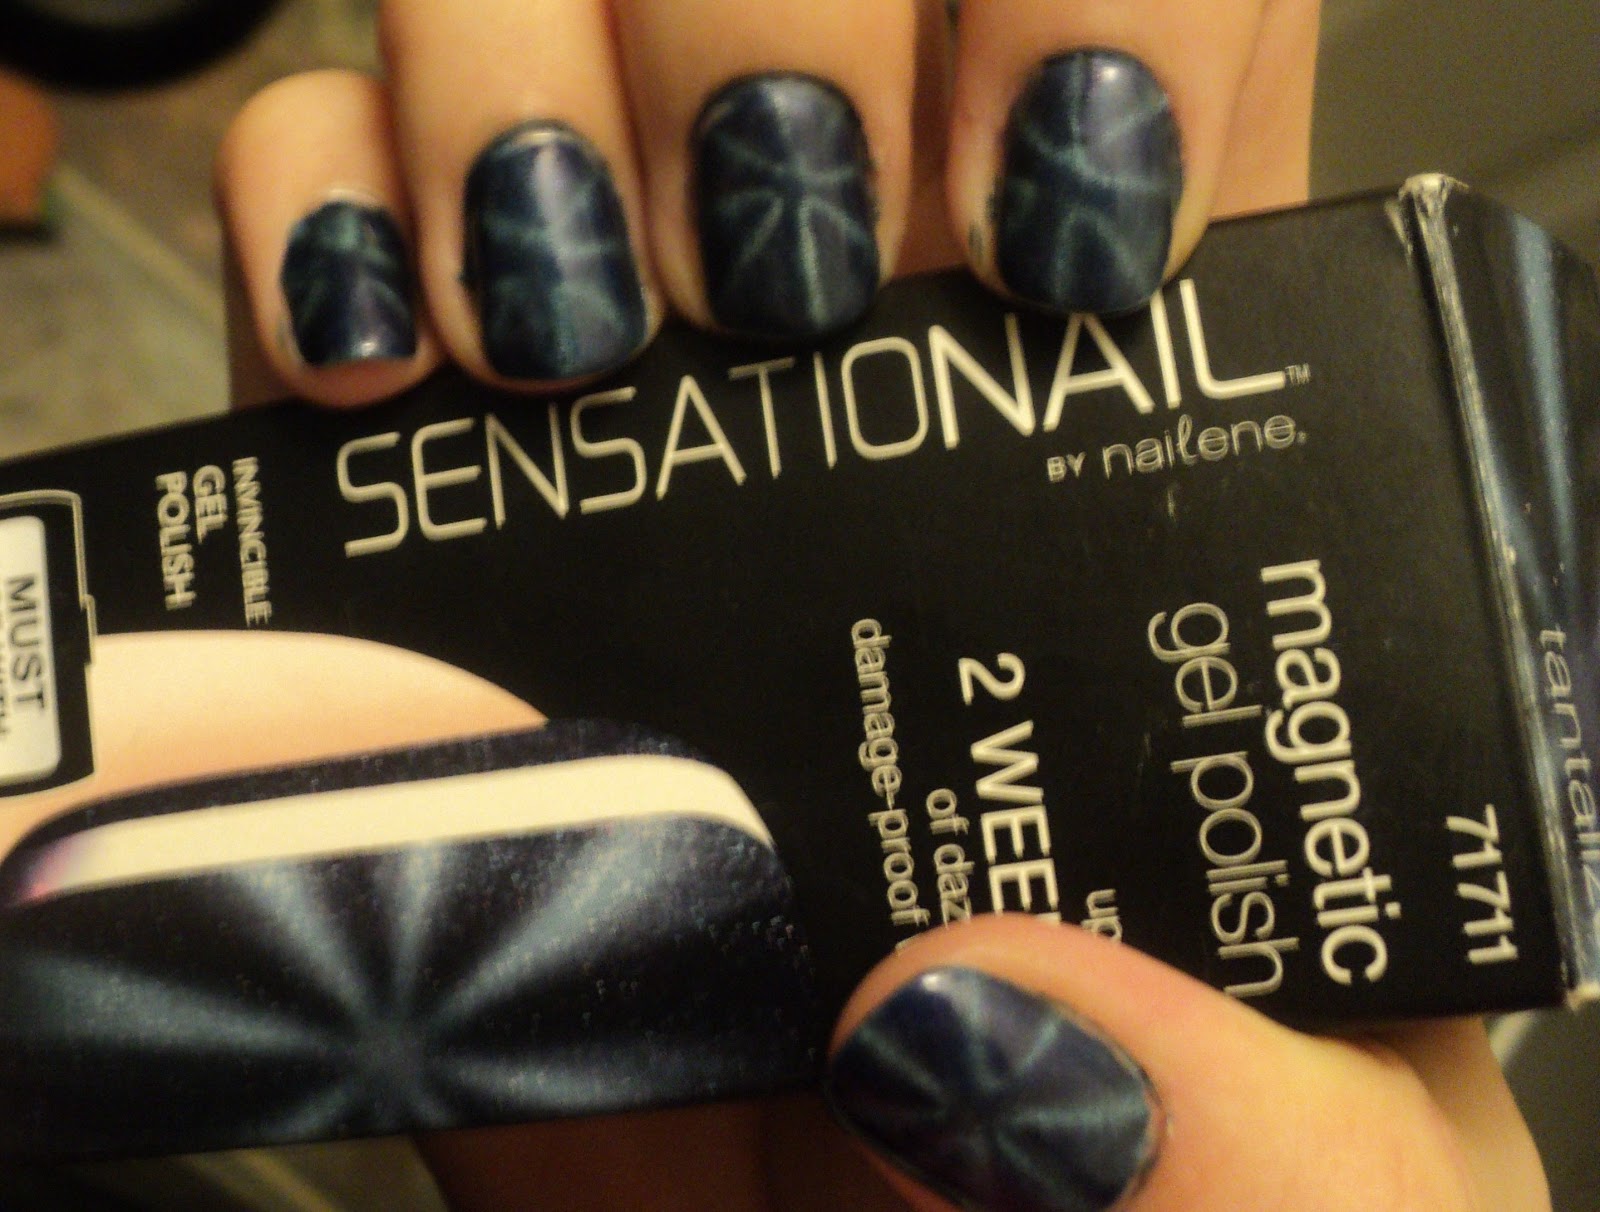
So you all know of my Senstionail obsession, if not you do now! Anyway, for the longest time I have wanted to try a matte finish nail polish but did not want to give up on my Sensationail nails. So I have solved this problem by figuring out how to get a matte finish using one Sensationail products!
So this is the design I chose. I also added some clear polish on the top to create a cool design. But enough of that, lets get to the good stuff! Here is my tutorial:
To elaborate a little further, in case the picture above is a little confusing.
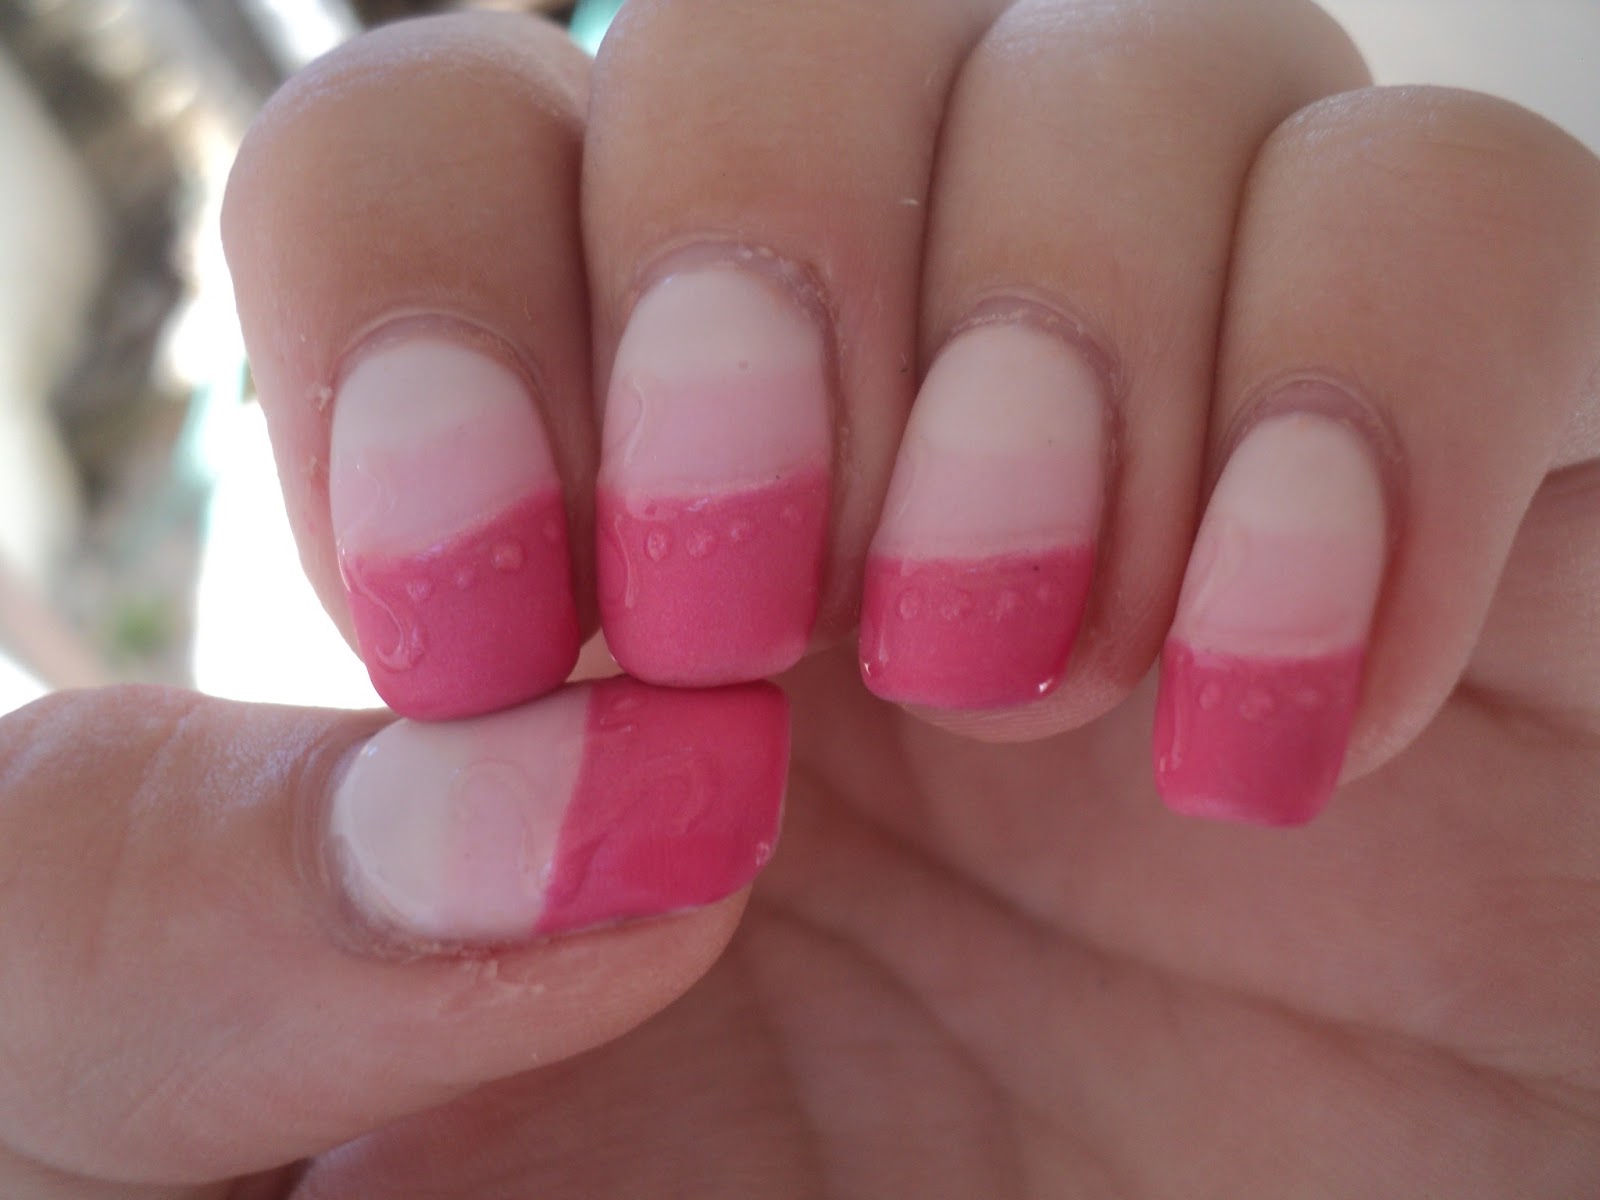
Step 1: paint your nails like you would normally. You can choose any design or any color you would like and it’s not the color that produces the matte finish. I decided to do a pink gradient.
Step 2: Make sure to add an extra coat of clear. We do this because you don’t want to lose any of your color when doing step 3.
Step 3: Take the softer end of a nail file and gently buff your entire nail. You don’t want any shine showing otherwise you will lose the matte effect. Make sure you cleanse your nail with the gel cleaner afterwords.
Step 4: If you would like you can add a design on top of your nail like I did to create a 2 dimensional look. All you do is take your clear coat either using a toothpick or any other nail tool you would like and draw your design. You could also just paint the tips for a french manicure look. Remove the tacky layer with your gel cleanser and viola! You have a Matte Gel Nail Design !
Let us know if you tried this and be sure to post pictures letting us know your results! We love seeing new designs!
Share Button

SensatioNail Review, Tips and Nail Art

If you have been following this blog for a while you know that nail polish is not my nails best friend. I have a very hard time finding nail polish that will actually stay on my nails without magic. I recently found that magic in SensatioNail’s Invincible Gel Polish. I was able to get a couple really great colors, and even their starter kit to review for you guys.

Let’s start with SensatioNail’s Starter Kit. The Starter Kit comes with a Pro 3060 LED Lamp, Gel Cleanser, Gel Primer, Gel Base and Top Coat, Nail Buffer, Manicure Stick, Lint-Free Wipes, and either Scarlett Red or Raspberry Wine Gel Polish. It comes with enough supplies to complete at least 10 manicures, and each manicure lasts up to 2 weeks! In order to use any gel polish you need the LED Lamp so I was glad I was able to receive this set. My set came with Raspberry Wine Gel Polish which is a really pretty shimmery red. I’m normally not a big fan of red, but with this color and with it being the holidays I have really enjoyed having it.
The LED Lamp is very small. While I do love that it is small, I do think that it is a little too small. Because of the angle of my thumb when placed with my other fingers I have to cure my thumbnail separately from my other nails because sometimes it doesn’t completely cure. I also wish that the lamp was battery operated so that I could carry it around with me and not be tethered to a wall. Others that have a specific place to do their nails, or even a desk I’m sure would benefit from this and if you don’t like the expense of batteries this would also be good for you. Other than that the lamp works great! Regular UV lamps take double the amount of time to cure, so I love how fast this system works. It cures quickly and is not bulky so it’s easy to store. So if you’re like me and don’t have much room for nail products it’s size is a real life saver.
The Gel Cleanser and Gel Primer are great and I think one of the main reasons that this kit works so well for me. They help make sure that your nails are clean and that the polish will stick to your nails. They really help keep this kit simple and easy to use.
While they may not have many colors the colors they do have are wonderful! I am surprised every time I use them! They are extremely vibrant and shiny. The shine lasts the whole time, and doesn’t seem to wear off like other polish. It helps me want to keep my nail polish on for as long as possible so I don’t waste the shine.

After using this kit along with other SensatioNail polish, I have come across a couple tips that I think you should know about.

  1. Make sure to follow the directions carefully. If you miss a step it could either ruin your manicure or it could last a lot less time.
  2. Make sure to avoid your skin. If you you get the polish on your skin it could make your polish peel off. If you accidentally get polish on your skin make sure to wipe it off with a clean cloth or acetone before curing that layer of polish.
  3. Always cap your nails. I personally only cap them twice (once with the first layer of color, and once with the top coat) because I don’t want the ends to be too thick.
  4. If you are having trouble keeping the polish on your nails try soaking your nails in a mixture of vinegar and water for 5-10 minutes to help dry out your nails. This will help the polish stick to your nails so your manicure can last longer. Make sure to put lotion on after you are finished with your manicure so that your hands do not dry out in the process.
  5. Is your manicure still in tact at the two week mark and you love the color, but you hate that your natural nail is starting to show? You can fill your manicure by buffing both your natural nail and your SensatioNail manicure and painting your natural nail with the color you already used, and putting a new clear coat on. That way you don’t have to waste your favorite color!
  6. Oops! Did one of your nails break? Not a problem! You can fix a crack in your nails by creating your SensatioNail manicure over your broken nail. I had this problem and prolonged the life of my broken nail for over a week before I had to say goodbye.
I was able to create many different manicures with a small amount of colors. One of the perks of using gel nail polish is that you do everything layer by layer, and it won’t dry until you cure it. So if you mess up on your design and you want to start over just wipe it off and start again. You can see some of the manicures I have created so far with SensatioNail below!
Colors used: Gold Glitter and Color set (midnight Rendezvous for the base and Gold Glitter) , and Raspberry Wine.

Colors used: Gold Glitter and Color set (Gold Glitter for the base and Midnight Rendevzous for the bow outline) , and Raspberry Wine

Color used: Magnetic Tantalize

Colors used: Rasperry wine for the base and Glitter and Color Duo (Midnight Rendezvous and Gold Glitter)
Day 5 and still beautiful! Colors used: Glitter and Color Duo ( Midnight Rondezvous for the base and Gold Glitter)

The more manicures I did the better they turned out, and the longer they stayed on. If you are one that has a hard time keeping your nail polish clean you may not get perfect results on the first try. Not all manicures will last 2 weeks, but even so they will last longer than traditional polish and will look much better and will keep your nails strong! I am very happy with this polish and have already added to my collection. Stay Tuned to see more manicures created with SensatioNail!

I wasn’t able to snag a giveaway for this product, but make sure to like their Facebook page here to find lots of deals and giveaways. They just did a Fan Appreciation Giveaway of 3,000 bottles of their gel polish!! I love hanging around their Facebook page to find out tips, and just to see what manicures have been created using SensatioNail. Also make sure to check out their website for their latest products here!

Have you used SensatioNail? Let us know what you think in the comments below!

Happy Holidays!

**Disclaimer** I was in no way paid, or obligated to give a positive review, or a review at all for this company. If you would like to read my full disclaimer for reviews you can find it here .

Share Button

Paul & Joe Review

Who is Paul & Joe made for?
“Women who are totally self aware and fueled by an inner confidence. Women who are brimming with so much determination to enjoy life that they may seem a little hedonistic. She is savvy, stylish, and not afraid to address her needs and desired. Women who have these qualities, and at the same time project charm, passion, and compassion. These are the women Paul & Joe is made for.”
Does this sound like you, or someone you know? If so then I have something really cool to share with you.
When you look at all the Paul & Joe products you can’t help but think about how cute they are. To me Paul & Joe products are adult beauty products in kids packaging. Before you think that this is a bad thing, please reconsider. Their products may have all the fun qualities of children’s play makeup such as fun colors, and fun packaging, but they have the quality of some of the most expensive cosmetics without the price tag. I was able to receive a sample of their nail polish as well as their lip gloss from their summer 2012 cosmetics line.
Before I share with you my findings on these products I wanted to tell you why I was beyond excited to review them The summer 2012 line is inspired by Shakespeare’s play “A Midsummer Night’s Dream.” So this lines colors are made to remind you of everything that has to do with my favorite thing, fairies! I could not wait to get this collection into my hands!
The first product that I am going to talk about is the “Fairie Kisses” Lip gloss. At first I was terrified of using this product. Remember when I said that the colors and designs reminded me of children’s makeup? This lip gloss is the man reason I said that. Not only is the lip gloss in a tube that a child would love, which mine does, but the lip gloss itself is green. Green is one of my least favorite colors, and definitely not a color I would choose for my lips, but I decided to try it anyway.

I was very surprised with this product. What I thought would be a horrible experience ended up being amazing. The lip gloss not only went on clear, but stayed on for a very long time. It was not overly sticky and did not make my lips feel weird or dry out when it wore off. In fact, it actually plumped and even conditioned my lips. I could not believe how amazing my lips looked and felt with this lip gloss on. It must have been the added pixie-dust!
My favorite of the two that I received was the “Pixie” nail polish. Pixie is a very sparkly silver based nail polish that when in the light comes to life by showing its many sparkling colors. While I generally love silver, I don’t normally wear it for long because the color either fades or the silver just becomes boring. I don’t think Pixie will ever becomes boring or will ever lose its shine!
This nail polish glides on like no other nail polish I have used. With most glittery nail polish it either takes a few tries to lay flat or will leave a lot of bumps on the surface from the glitter itself. I did not come across either problem when applying this nail polish. I only have to use 2 coats to get an amazing layer of color over my nails.
One thing I have always struggled with when it comes to nail polish is getting it to stay on my nails. Nail polish will literally peel right off in a matter of minutes, even acrylics will start to lift off of my nails on the first day. I am proud to report to you that this nail polish did not lift, peel, or even lose its perfect shine for over a week. I was so excited that I finally found a polish that not only looks great but that actually stays on my nails too. I will definitely be buying more of this nail polish, along with other colors in the very near future!
You can find these and other great Paul & Joe products here.

**Disclaimer** I was in no way paid, or obligated to give a positive review, or a review at all for this company. If you would like to read my full disclaimer for reviews you can find it here.

Share Button