As many of you know, my house is obsessed with having white teeth. We have tried just about everything and have only found a couple of things that work for us. We either run into something that does very little for our teeth, or that leaves our teeth so sensitive we never try it again. It’s never ending cycle that never gives us what we want. When Smile Brilliant contacted me about reviewing their product I was a little worried, but after I took a look at their website I became very excited.
So what is it about Smile Brilliant that has made me this excited? Not only do they offer a great whitening treatment, but as part of the whitening kit you get custom made whitening trays. They made the process really simple for us and today I will share our experience with creating our molds!
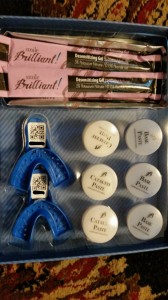
Smile Brilliant Whitening Kit
The instructions are pretty simple which made things so easy! The first step is to brush and floss your teeth. That way if you have something stuck to your teeth you can get it off before it can ruin the mold. It may seem like its something that everyone knows you should do, but for those of us that have never made a custom mold of our teeth before it’s definitely an important step.
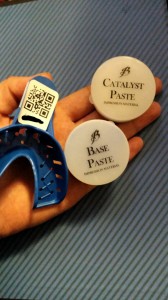
Impression Tray, Base Paste and Catalyst Paste
Next you need to mix the Base Paste and the Catalyst paste until they are mixed thoroughly. I found this to be pretty easy, but there is a time limit. You must have them mixed together within one minute and get them placed in the tray. I found it easiest to make the glob into almost a snake (let’s go back to preschool please!) and then just place it into the tray.
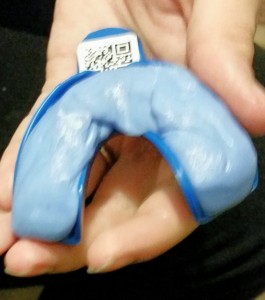
Paste Added To Impression Tray
Once the paste is in the tray you use your fingers to gently place the mold onto your teeth. The instructions say that you are not supposed to bite down, which according to my husband was the hardest part. He couldn’t stop laughing the whole time. We definitely had some fun with it!
After two minutes you have to take the trays out of your mouth and try not to mess up the impressions. I have to say, seeing your teeth in a mold is an interesting experience. I think its crazy that they can turn the impressions into the whitening trays.
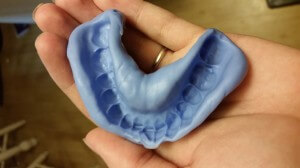
Impression
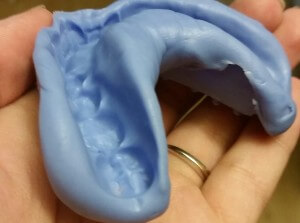
Impression
Now the hard part is over! You just have to wait 10 minutes for the impressions to fully dry, rinse them off, throw them in the envelope and send them on their way! In 5-7 days (after they get them of course) they will have your trays ready and will send them out to you. I found the process very easy and it did not take long to do.
We are currently waiting for our whitening trays to arrive, but once they do we will share how the whitening experience goes. So stay tuned!
In the meantime be sure to check out Smile Brilliant on their website here and on Facebook and Twitter!
**Disclaimer** Star Focal received samples of the above product in order to facilitate a review. However, we were in no way paid, or obligated to give a positive review, or a review at all for this company. If you would like to read my full disclaimer for reviews you can find it here .

Speak Your Mind