So we have an interesting post for you guys today! A couple days ago I decided to Zombie nails! It was so much fun and pretty easy to do. I decided to create a Zombie Nails Tutorial for you guys! ![]()
Step 1:
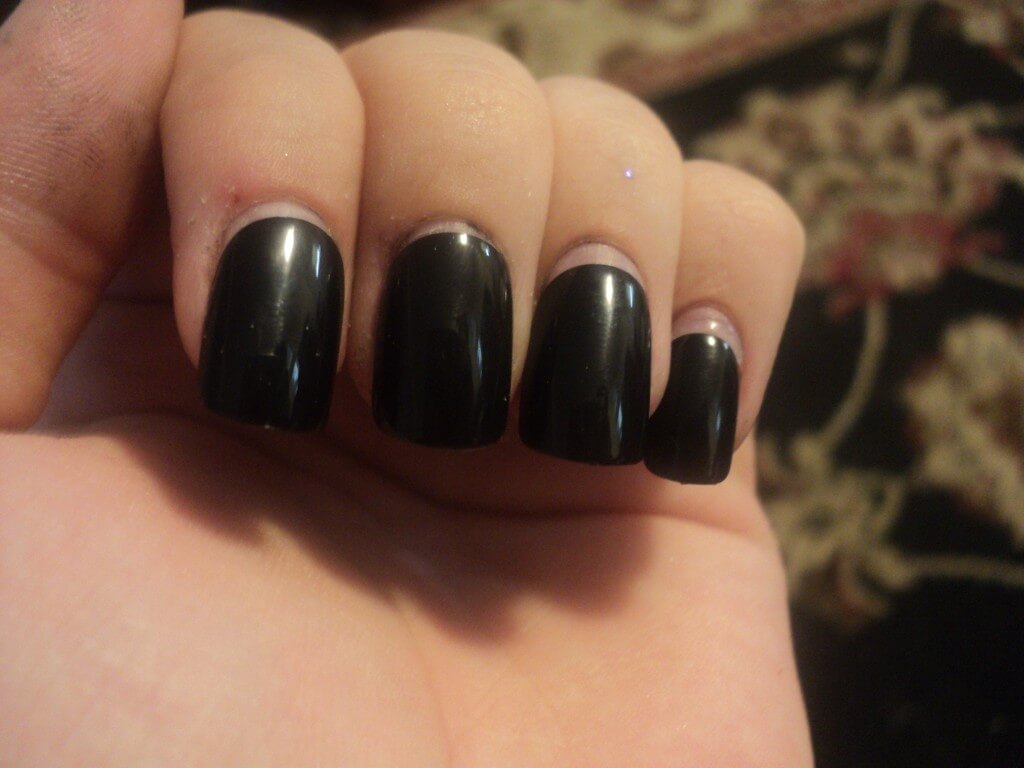
I tried to take pics a long the way so I have a couple to help you recreate the look. First you find some press on fake nails. I used black because I wanted a darker effect on the ends but you can use pretty much any color since you will be covering most of it with polish anyway.
Step 2:
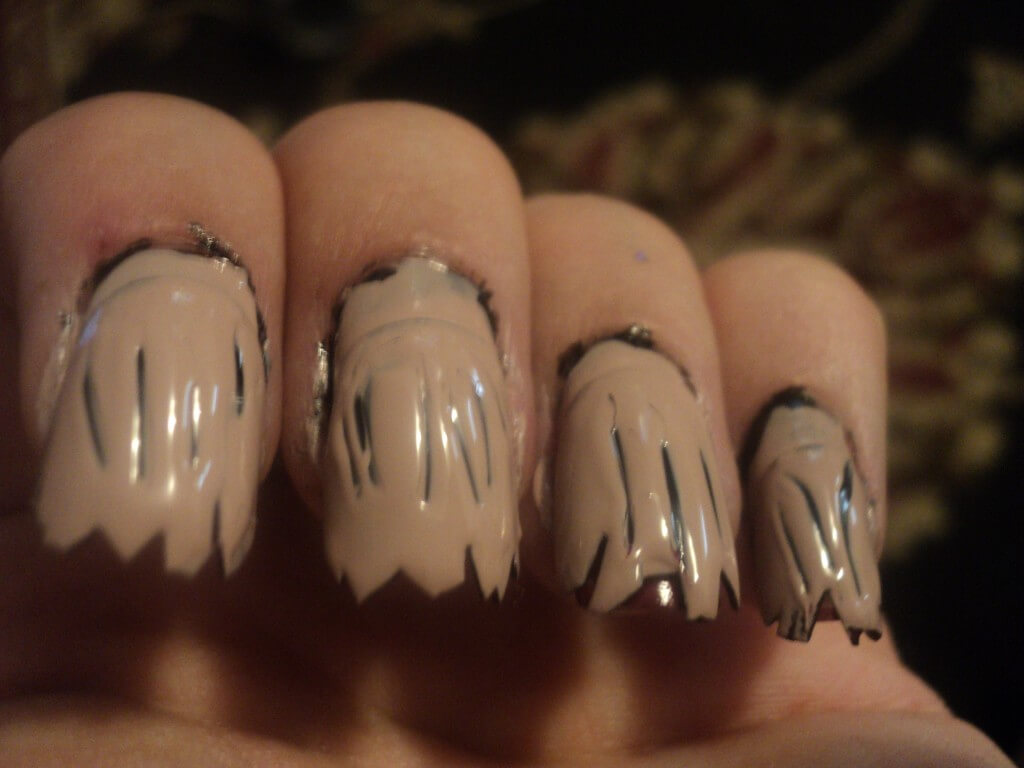
Next you have to “mangle” the ends of the nails (best if the nails are not on you). You can take nail clippers and cut angles or random cuts into the ends. These nails were a little shorter than I wanted so they looked a little funny when I put them on. I would suggest finding nails that are longer than your natural nail so that you don’t have them in awkward positions. The good thing about them being shorter is that they did make an awesome effect once they were all painted.

Step 3:
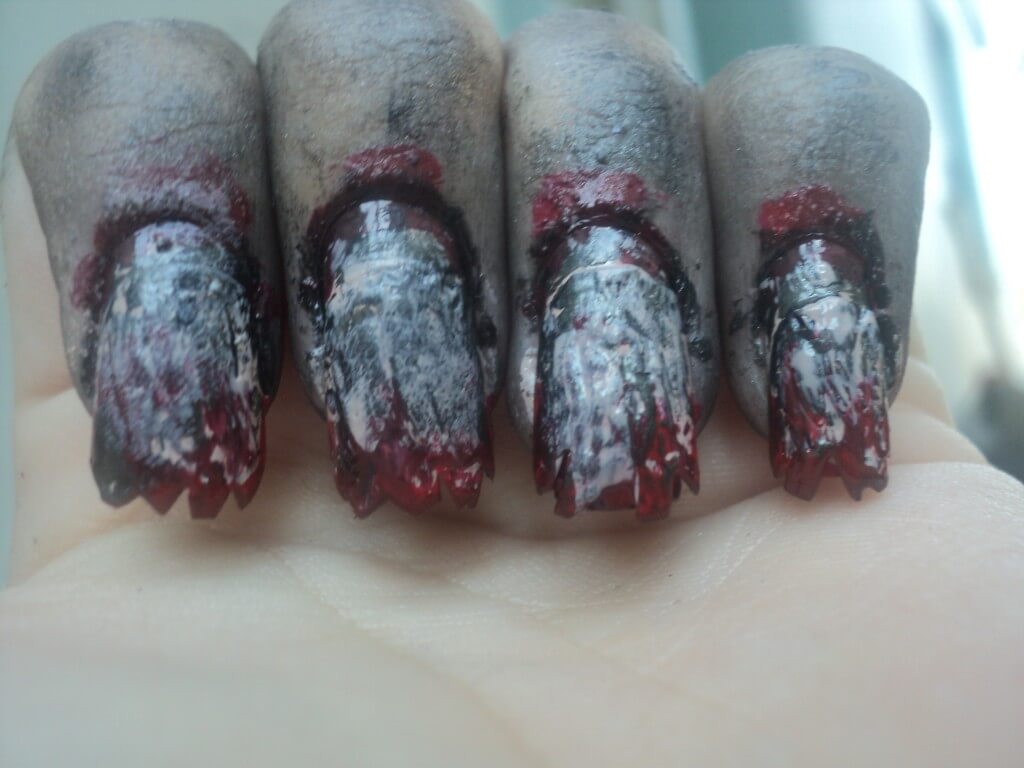
If you ending up having a gap in between like I did paint the extra in the color of the fake nail. Then pain your nail with a neutral color. I used Joshua Tree from Cult Cosmetics that is like a nude color, but I have seen others use light grey’s and it still comes out great. I just think the fleshy like color looks better. After you paint two coats add some texture by running a toothpick down your nails. Not all lines will stay to the end but even the little bit that do add a little extra to the design.
Step 4:
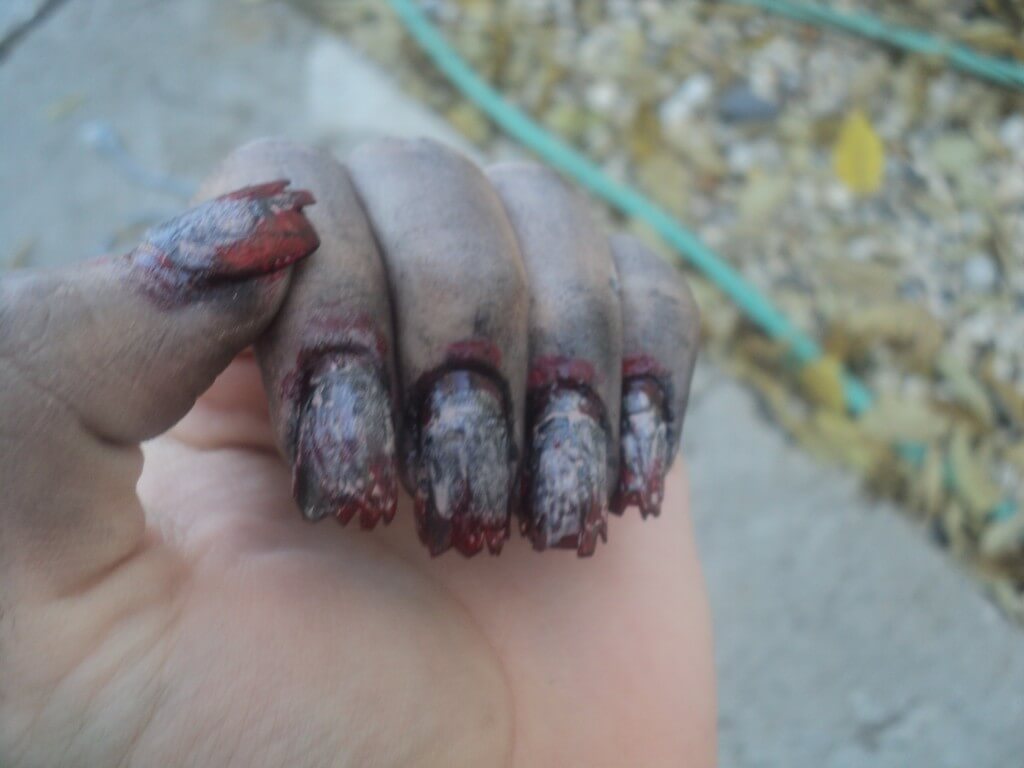
Next you take a dark red and paint where you are going to have the “blood” I painted mine on my natural nail in between the cracks (you can see above) and around the cuticles. The dark red gives the “blood” dimension and makes it look like some has dried over time.
Step 5:
This is where it starts getting fun! I used a couple different colors for this next part but you can use pretty much anything in the same realm to get the same look. First I started with a black. Take your nail polish brush and wipe the majority of the nail polish off of it. After, take the brush and starting from the cuticle sweep the brush down toward the end. You definitely don’t want every stroke to be perfect. Zombies don’t have perfect nails. ![]()
Repeat step 5 with your other colors as well. I went crazy and decided to use a dark silvery grey to make it different but most would say to use dark grey with no sparkles. I did step 5 again and again until I got the look I wanted!
Step 6:
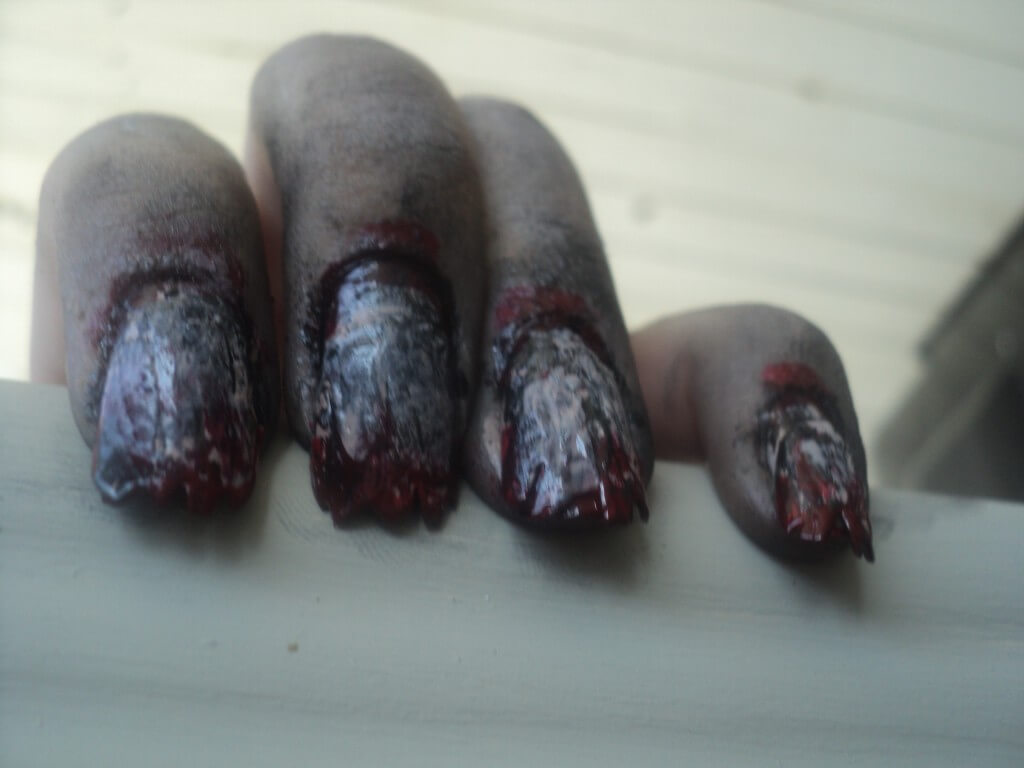
Last but not least, THE BLOOD! I used a bright red for this step but you don’t have to go quite as bright. First you put a bunch of the red around your cuticles and in the mangled ends of the nail. Then you repeat step 5 but drag the polish from the tip of your nail.
Step 7:
If you want more than just your nails to be zombied out you can use eye shadow and other makeup on you hands to finish the look. I used greys, some black, browns and some tans.
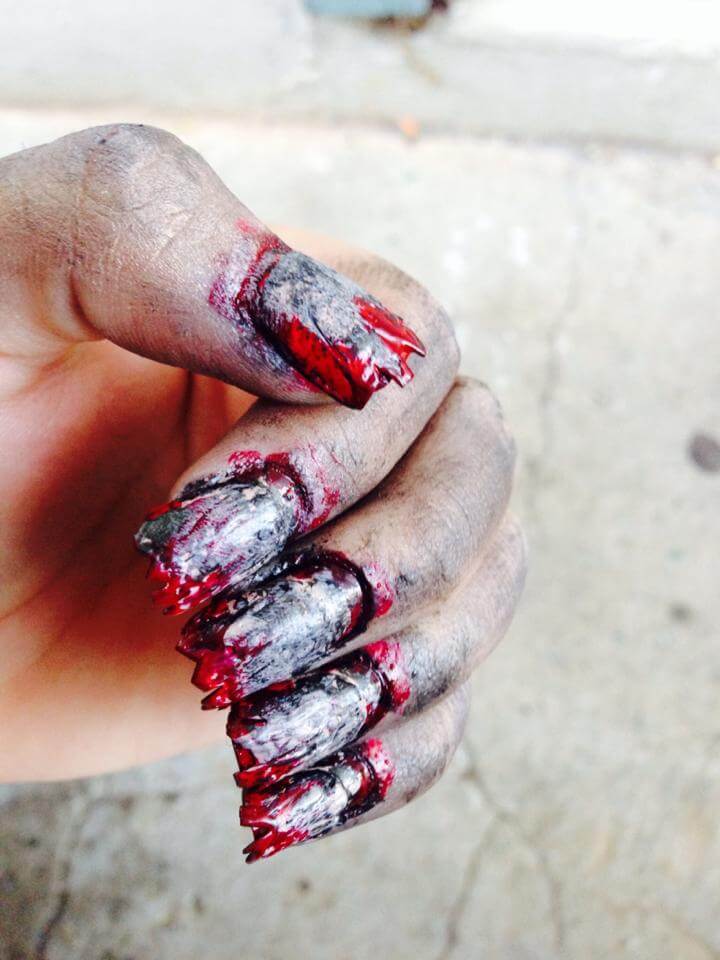
I think it turned out amazing! I loved them and I even got to freak some people out in the process! Be sure to stay tuned for more great designs!

Awesome!!! They look so authentic! I bet they suck to take off though, lol. But worth it to have the perfect costume
They weren’t that bad actually! I used the sticky tabs on the nails instead of nail glue and most of the polish is on the fake nail I had some black in my cuticles for about a day after, but it was definitely worth it
Those are some wicked looking nails!
Uhh !! These nail design looks so hirrible . I can’t try these zombie nail art on my nails. Very scary nail art.
Jones recently posted…15 Wedding Nail Design Ideas For Wedding Day